Using the PyQt Designer to create Python programs

No. 11
In 1991, Microsoft introduced Visual Basic, a simple event driven language based more or less on the syntax of the 1981 BASIC shipped with the first IBM PC. The original Visual BASIC was little more than a toy for making simple Windows programs, but by version 3, shipped in 1993, you could use it to build real, interactive Windows programs, and became the basis for hundreds of thousands of Windows software packages. Versions 4, 5 and 6 extended the capabilities of the language, but in all cases you started with a form designer where you could place Windows controls (buttons, checkboxes, radio buttons and list boxes) and by simply double clicking on the controls, write the code that connected the controls and accessed files and databases.
This continued in VB.NET, which introduced classes, object-oriented programming, inheritance and a lot of powerful capabilities for building real programs. This version of the language is still available for a free download and works in the Visual Studio environment, along with C# and C++.
PyQt5 Designer
With the experience of having built real, commercial products in Visual Basic, we approached a serious exploration of the capabilities of the Designer program that comes with PyQt5. We decided to create a fairly simple program using 2 groups of radio buttons, a listbox, a label, a text entry field and two pushbuttons.
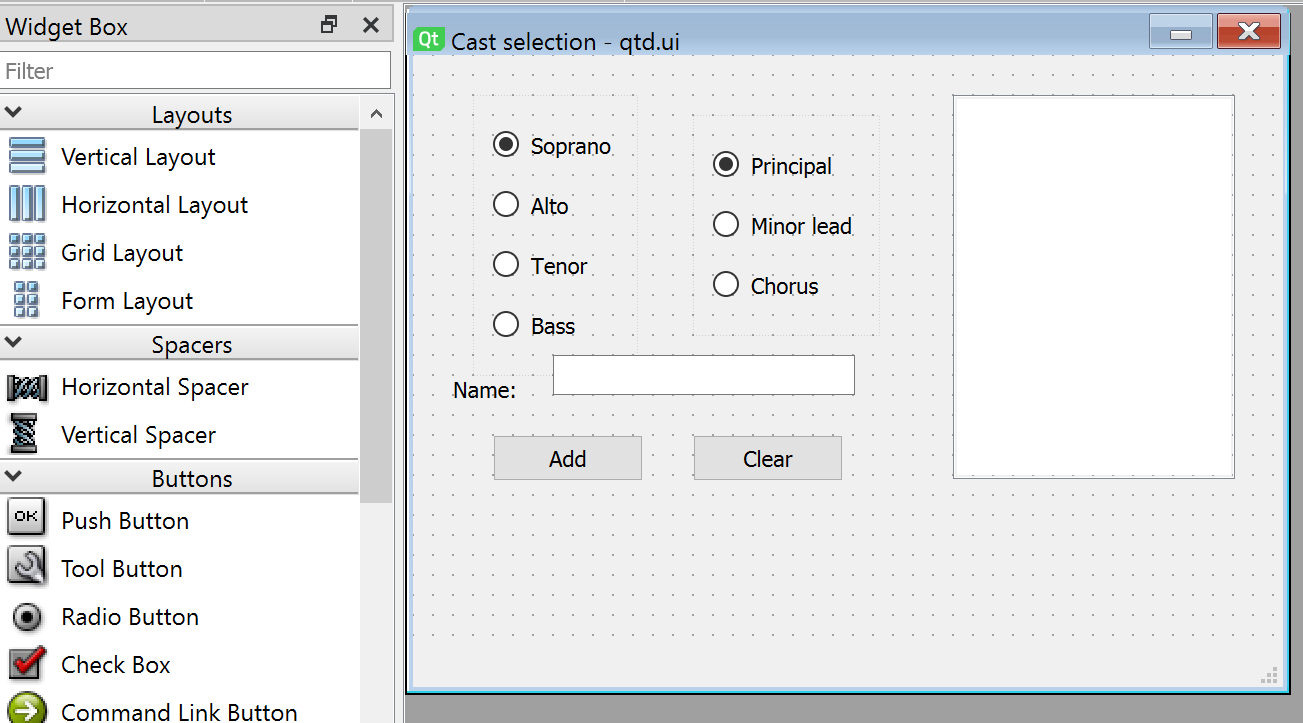
Figure 1- The Designer screen
This figure shows the design we created along with some of the widgets you can choose from. One odd thing about the Designer is that clicking on one of those widgets gives you no feedback: nothing is highlighted or recessed to show that that is the control you want to use, Instead, you click on any control and then drag it onto the form palette on its right. You can place all the controls in absolute terms or you can use a layout manager. For this trial, we created two QFrames to put the radio buttons in and inserted a Grid layout in each of them. This helps make sure the buttons are laid out evenly.
Now, the purpose of this program, is to add a name to the list box, along with the voice part and kind of role. So, we need to figure out which of each of the groups of radio buttons has been selected. And, while you can run through them and poll them, and then calculate a shortened version of each label to put in the list box. The result is shown here:

Figure 2 – The sample application as generated(with editing)
Deriving new Radiobuttons
Once you create a Frame full of radio buttons, you need to find a way to discover which was has been selected. We dealt with this problem in this article on PyQT5 radio buttons. Basically, we created a derived button which has a class level variable containing the index of the selected button, and a method that receives the click event to change the index of that button in the class-level variable. For the Voice buttons, the whole class looks like this:
class VoiceButton(QRadioButton):
     vindex = 0
voices =["Sop", "Alt", "Ten", "Bas"]
     def __init__(self, frame, index):
         super().__init__(frame)
         self.index = index
         self.clicked.connect(self.click)
    def click(self):
         VoiceButton.vindex = self.index
Then we create a similar derived class for the RoleButton.
The question is how do we derive a new class when we are using the PyQt Designer? Fortunately, they thought of this. You can right-click on any of the radio buttons in the Form and select the menu item Promote to… This brings up a window where you can name the derived class.
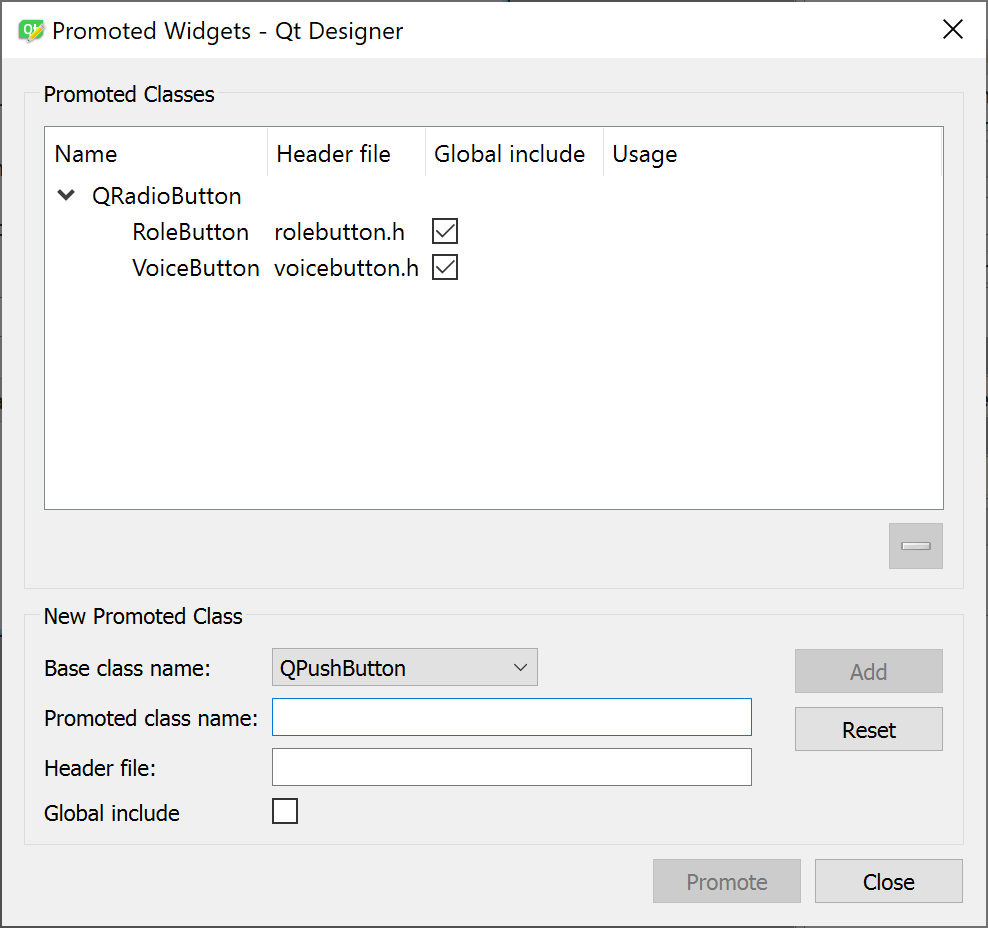
Figure 3- Creating a derived button
You don’t write any code here, but the Designer generates the code to create instances of these new derived buttons. You create another Python file module that contains the code for these derived buttons like the one above.
So, the important point here is that the design of you user interface is stored in an XML file with a .ui extension. You can convert it to a Python by with the command line pyuic5 tool. Assuming that you have added it to your path, you can type:
pyuic5.exe -x qtd.ui qtd.py
The generated code contains import statements for these new modules you write.
from rolebutton import RoleButton
from voicebutton import VoiceButton
This actually works pretty well, although you might find it convenient to put those two derived classes in an single file and edit the import to
from buttons import RoleButton
from buttons import VoiceButton
instead.
The other important change is that the init constructor for these new buttons has an additional argument that contains the index of each of those radio buttons. You can assign any numbers you want, but using numbers starting from zero makes them easily used as list (array) indices. To create the buttons. They sort of look like this,
        vs = VoiceButton("Soprano", 0)
        vs.setChecked(True)     # first one is checked
        va = VoiceButton("Alto", 1)
        vt = VoiceButton("Tenor", 2)
        vb = VoiceButton("Bass", 3)
but the generated code from the Designer includes a lot of other settings for each button, which are basically their defaults. So you need to edit the generated code to include these in the constructor. Then, when you click on any radio button, the click event copies the index of that button into the class level variable for all of that group of radio buttons. We note that there are many ways to approach these derived buttons, but this approach is one of the simplest to explain.
Running the PyQt5 program
Now if you put your generated (and slightly edited) file into a Pycharm project along with the file buttons.py that includes the definitions of the two derived radio buttons, you might get a program display that looks like this:
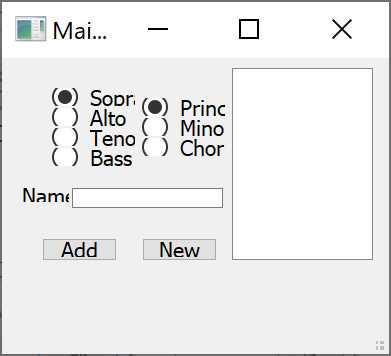
Figure 4- The unscaled image
This is either a bug or an annoying feature of PyQt5. Searching stackoverflow leads to an fix for this. You need to put the following code in your program before PyQT5 creates any window:
if hasattr(QtCore.Qt, 'AA_EnableHighDpiScaling'):
    QtWidgets.QApplication.setAttribute(
        QtCore.Qt.AA_EnableHighDpiScaling, True)

if hasattr(QtCore.Qt, 'AA_UseHighDpiPixmaps'):
    QtWidgets.QApplication.setAttribute(
        QtCore.Qt.AA_UseHighDpiPixmaps, True)
In our case, we just included it in the buttons.py file. Then the result is the one given in Figure 2.
The kicker
Now the kicker in all this is that the Python file created from the .ui file does not know about any small tweaks or edits you may then make. And if you generate a new Python file to change the interface slightly, any of these small tweaks are lost and have to be re-inserted. This is OK when you are iterating your design, but once you have gotten it the way you want and included any derived classes, it would be a royal pain to keep reinserting them.
Creating the PyQt window without using the Designer
Of course, creating the window in code is actually easier. It probably took us a day to fuss with the Designer and the conversion to the Python file and to figure out the tweaks and the screen resolution problem. But, we wrote the code to produce much the same screen layout in a couple of hours, resulting in the window in Figure 5.
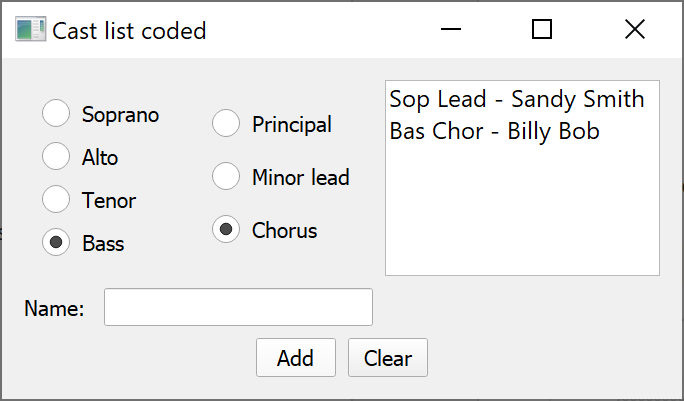
Figure 5- The same window written in code
Return to Visual Basic
We did download Visual Studio and the code for Visual Basic, and found that it took us less than an hour to write the code to do the same things in Visual Basic, as show in Figure 6.
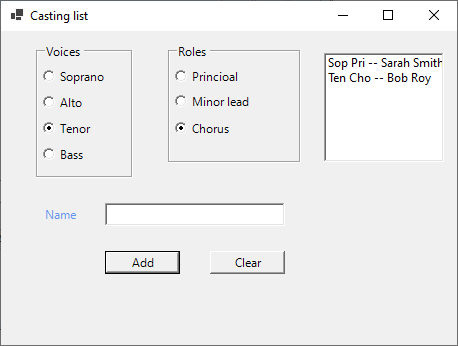
Figure 6 - The same program written in Visual Basic
And in VB, you can change or tweak the interface and run it immediately without the awkward generation of intermediate code files. The version of Visual Basic that could do this was first created 23 years ago, and it remains a standard for a good interface builder. It is a shame that the PyQt developers didn’t follow their lead, because if they had, this would be much more of a killer product.
In case you’re wondering, the entire VB code for this program is just:
Public Class Form1
    Private Sub Addbutton_Click(sender As Object, e As EventArgs) _
               Handles Addbutton.Click
        Dim crb As RadioButton, tx As String, rb As RadioButton, _
               rx As String

        'get the voice part text and shorten it
        crb = GetRadio(VoiceBox)
        tx = crb.Text.Substring(0, 3)

        'get the role name
        rb = GetRadio(RoleBox)
        rx = rb.Text.Substring(0, 3)

        'add to listbox
        Namelist.Items.Add(tx + " " + rx + " -- " + namebox.Text)
        namebox.Text = ""
    End Sub

    Private Sub Clearbutton_Click(sender As Object, e As EventArgs)_
                           Handles Clearbutton.Click
        namebox.Text = ""
        Namelist.Items.Clear()
    End Sub

    Private Function GetRadio(rbox As GroupBox)
       Return rbox.Controls.OfType(Of RadioButton)()_
           .FirstOrDefault(Function(radioButton) radioButton.Checked)
    End Function
End Class
And nearly all of the outer code was generated automatically when I double clicked on the Add button in the VB designer!
This weekend, Riverbank Computing announced PyQt6. It does not appear that the Designer has changed, however.
All code can be downloaded from GitHub under jameswcooper/newsletter.
Subscribe to this newsletter so you don’t miss a single Monday’s issue!