Simple Kivy interfaces in Python

In our previous article, we showed how you can make a calculator interface using Kivy, an alternative GUI system that can be used on desktops and mobile devices. In this article, we’ll start from the beginning and make a couple of simpler programs, ending up with this addition program.
Let’s start with a simple Kivy program that displays a button and a label. When you click on the button, it changes the label’s text. The Python code for this is incredibly simple, because most of the work is done in the kivy descriptor file. Here’s the Python. It starts with a MainApp, which loads an instance of a class which is where most of the work takes place.
from kivy.app import App
from kivy.core.window import Window
from kivy.uix.floatlayout import FloatLayout


class OneBut(FloatLayout):
	def butclick(self):
		self.ids.toplabel.text='Hello again'

class MainApp(App):
	def build(self):
		Window.size = (300, 200)
		self.load_kv('onebut.kv')
		return OneBut()

MainApp().run()
What’s happening here is that an instance of the MainApp class is run. It must have a build() method. Here you can set the window size. If you specify the load_kv method, it loads that Kivy descriptor file. If you don’t specify one, it looks for a .kv file constructed from the App name, here MainApp, but it drops the “App” part and converts the name to lower case, and tries to load main.kv.
We have found it is safer to specify the name directly to make sure Kivy doesn’t go find some other random .kv file. And, in this case, we will be showing results from onebut.kv, onebut1.kv and onebut2.kv and this approach makes it easier to switch between them.
What happens next is that the MainApp class launches an instance of the OneBut class, which must be derived from the layout you are using, here FloatLayout, which lets you put components wherever you want.
The descriptor file or “kv file” starts with the class name of the main class, which here is OneBut.
# class and layout for one button display (with label)
<OneBut>:
    FloatLayout:
        Label:
            id: toplabel
            color: 0,0,1,1
            text: 'Hi there'
        Button:
            text: 'Hello'
            color: 0,0,0,1
            background_color: .9,.9,.9,
            on_press:
                root.butclick()
At the bottom of this kv file we see the on_press event which calls the butclick method in the OneBut class. This is why we need to have this class name at the top of the kv file. The Kivy documentation describes this all pretty clearly. Note the kv files have the same indentation as Python files, generally 4 characters for each level.
So, what happens when we click on the button? It calls the butclick() method
def butclick(self):
       self.ids.toplabel.text='Hello again'
which changes the text of the label to “Hello again.” Let’s try it. The name “toplabel” is the id of the Label widget declared in the kv file. That is how easy it is to access widgets in Kivy.
If you run OneBut.py you will get a window that looks like this:
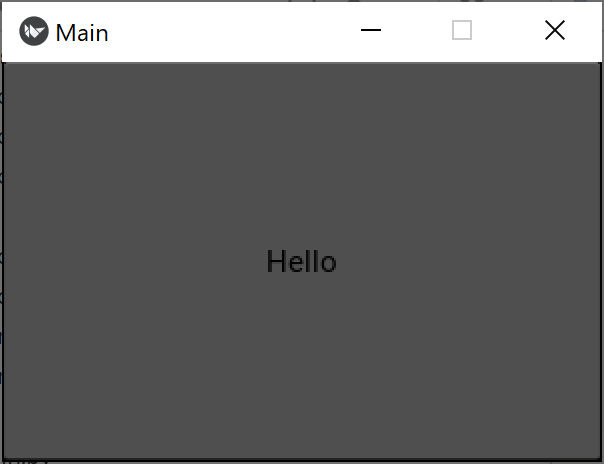
That’s kind of disheartening. What’s going on? Well, we chose the FloatLayout in that layout, the Button expands to fill the whole window. We don’t see the label at all, although if we click this ugly dark gray button, it flashes a sort of cyan background until you raise the mouse button.
The first improvement we need to make is to make the button smaller. We can do that with the size_hint property, which allows to set the size relative to the current window. So your new kv file is the same except for that size_hint. Our second kv file, then is onebut1.kv.
# class and layout for one button display (with label)
<OneBut>:
FloatLayout:
Label
id: toplabel
color: 0,0,1,1 #blue text
text: 'Hi there'
Button:
text: 'Hello'
color: 0,0,0,1 #black text
size_hint: (0.7,0.2)
background_color: .9,.9,.9, # gray background
on_press:
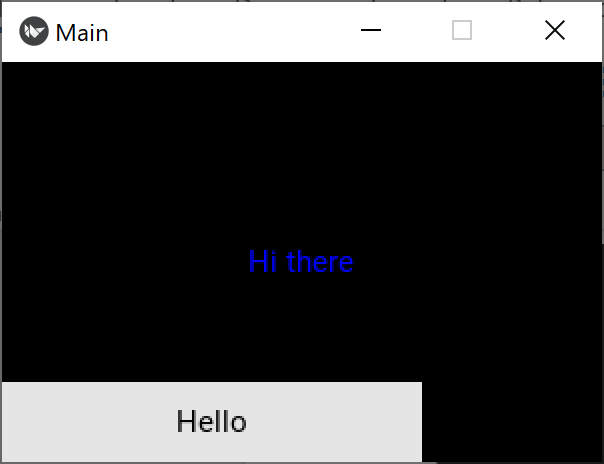
root.butclick()And here is the resulting window:

Well, that is still disappointing, and we’d call it bug-ugly! The button is not the color we wanted and the background is black instead of medium gray. What’s going on? Clearly both the defaults for background and button color and size are not what we would have hoped.
What’s going on is that before you can really change the button color, you have to set
background_normal: ''This weird setting is actually a string to refers to the path to a default background image that you don’t want. If you change that, the window looks like this:
That’s a little better, but why is the background that tedious black? It’s because there is no background color setting for the window itself. You have to create a rectangle and set its color instead. So, our final kv file with all that corrected looks like this.
# class and layout for one button display (with label)
<OneBut>:
    FloatLayout:
        canvas.before:
            Color:
                rgba: .8, .8, .8, 1
            Rectangle:
                size: self.size
                pos: self.pos

        Label
            id: toplabel
            color: 0,0,1,1
            text: 'Hi there'
        Button:
            text: 'Hello'
            color: 0,0,0,1
            background_normal: ''
            size_hint: (0.7,0.2)
            background_color: .9,.9,.9,
            on_press:
                root.butclick()
And our first useful window looks like this:
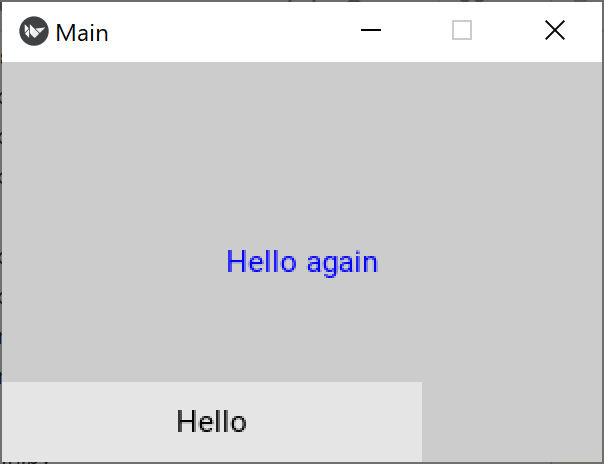
That is more useful, but hardly a professional looking window. The buttons have no borders or shading, and it is non trivial to create them in Kivy.
Program to add two numbers.
Now we are going to build a program that has two labels, two TextInput fields and two buttons. We’ll use the Vertical BoxLayout to add these widgets line by line. The layout will look like this:
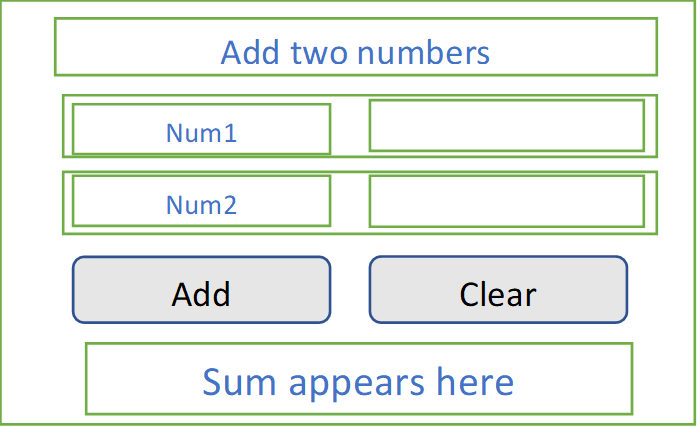
Rows 2 and 3 contain two fields, a Label and a TextInput widget. To arrange them in a single row, we create a little Horizontal BoxLayout and add the two fields to that. We do the same foe row 3 and for row 4, where we insert the two buttons.
Here is the top of that kv file:
<AddNums>:
    BoxLayout:
        spacing: 1
        orientation:'vertical'
        canvas.before:
            Color:
                rgba: .7, .7, .7, 1
            Rectangle:
                size: self.size
                pos: self.pos

        ColorLabel:
            text: "Enter two numbers to add"

        # Line 2 Horizontal box contains a label and a TextInput fiel
        BoxLayout:
            spacing: 1
            orientation:'horizontal'

            ColorLabel:
                text: 'Num1:'
                size_hint: (None,0.8)

            TextInput:
                id: frnum
                size_hint: (None, .8)
                width: 150
                write_tab: False
Line 3 is much the same except that we name the second TextInot field secnum. The fourth line contains the two buttons. Each has an on_press event that calls a method in the Python program.
# Line 4 horizontal box contains two buttons
        BoxLayout:
            spacing: 10
            orientation:'horizontal'

            GrayButton:
                text: 'Add'
                color: 0,0,0,1
                on_press:
                    root.bclick()

            GrayButton:
                text: 'Clear'
                on_press:
                    root.cclick()
Note that we create two derived classes, one for the blue labels and one for the gray buttons:
<ColorLabel@Label>:
    color: 0,0,1,1
    size: self.texture_size
    canvas.before:
        Color:
            rgba: .9, .9, .9, 1
        Rectangle:
            pos: self.pos
            size: self.size
    padding_x: 20

<GrayButton@Button>:
    color: 0,0,0,1
    background_normal: ''
    background_color: .8,.8,.8,1
    padding_horizontal: 20
    size_hint: (0.5,0.7)
The Python program that drives this is very simple. It really amounts to receiving and acting on the two click events.
rom kivy.app import App
from kivy.core.window import Window
from kivy.uix.boxlayout import BoxLayout
class AddNums(BoxLayout):
def build(self):
self.title = "Add two numbers"
Window.size = (300, 200)
self.load_kv('AddNumbers.kv')
# Add click event
def bclick(self):
val1= float(self.ids.frnum.text)
val2 = float(self.ids.secnum.text)
self.ids.sumlabel.text = "Sum is: "+ str(val1+val2)
# Clear button click event
def cclick(self):
self.ids.frnum.text = ''
self.ids.secnum.text = ''
self.ids.sumlabel.text =''
class MainApp(App):
def build(self):
Window.size = (300, 200)
self.load_kv('AddNumbers.kv')
return AddNums()
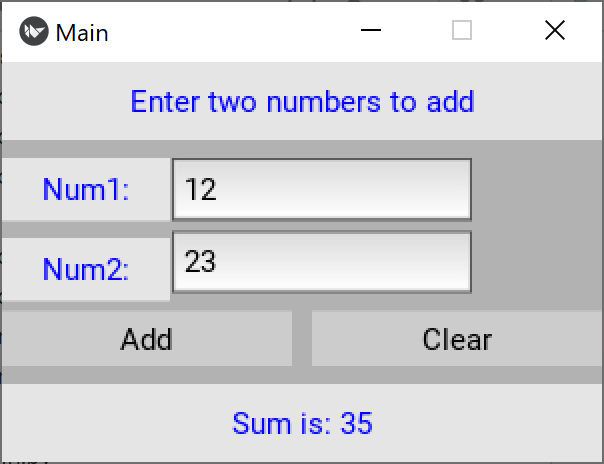
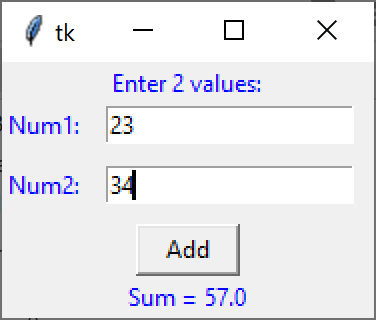
MainApp().run()The bclick method fetches the text from the frnum and secnum text fields, converts them to floats, and adds them together. It then puts the string version of that sum in the sumlabel field at the bottom of the window. The resulting program looks like this:

It’s a little clunky looking compared to the tkinter version below, but perfectly usable.
So, as you can see, it is very easy to write user interface programs in Kivy, although honestly, the tkinter program is not much more complicated. You can compare their code on our GitHub site. The Add2Numbers kivy version is 30 lines of Python and 80 lines of kivy code, while the pure Python tkinter program is only 75 lines long.
All code can be downloaded from GitHub under jameswcooper/newsletter.
Subscribe to this newsletter so you don’t miss a single Monday’s issue!